
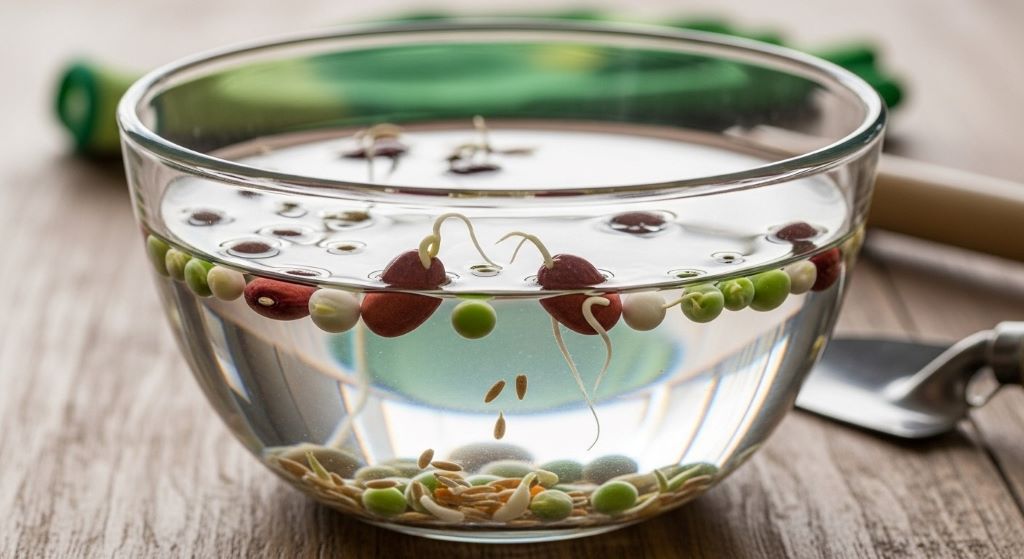
Every gardener wants faster results. Waiting for seeds to sprout can test your patience. Pre-soaking seeds is a time-tested technique that speeds up germination. This simple method can save days or even weeks of waiting time. At The Village Gardener, we help gardeners understand which techniques work best for successful growing seasons.
Pre-soaking involves placing seeds in water before planting. The moisture softens the seed coat. This allows the embryo inside to break through more easily. However, the relationship between soaking time and germination speed is not always straightforward. Different seeds respond differently to this treatment. Understanding these patterns helps you make informed decisions.
Many factors influence germination success. Seed type, water temperature, and soaking duration all play roles. Knowing how long for seed to germinate helps you plan your garden timeline effectively. Additionally, proper pre-soaking techniques can dramatically improve your success rates. Therefore, learning the science behind this process is valuable.
Understanding the Germination Process
Germination begins when a seed absorbs water. This process is called imbibition. The seed swells as moisture enters through tiny pores. Enzymes activate inside the seed. These enzymes break down stored nutrients. The embryo uses these nutrients for initial growth.
The seed coat serves as a protective barrier. Some coats are very hard and thick. They evolved to withstand harsh conditions. However, this protection can delay germination. Water must penetrate the coat before growth begins. Pre-soaking helps overcome this natural barrier.
Temperature also affects germination speed. Most seeds have optimal temperature ranges. Warm conditions generally speed up the process. Cold temperatures slow metabolic activity. Therefore, combining pre-soaking with proper temperature control maximizes results.
Oxygen availability matters too. Seeds need oxygen to germinate. Waterlogged conditions can actually inhibit growth. This is why soaking duration requires careful attention. Too much water can drown seeds. Finding the right balance is essential.
The Science Behind Pre-Soaking Seeds
Pre-soaking works by jump-starting imbibition. Seeds naturally absorb water from soil. However, this process can be slow. Direct water contact accelerates absorption. The seed coat softens more quickly. This allows the radicle to emerge sooner.
Research shows that pre-soaking can reduce germination time significantly. Some hard-coated seeds benefit most. Beans, peas, and morning glories respond well. These seeds have thick outer layers. Soaking can cut germination time by 30 to 50 percent.
The water temperature during soaking matters. Warm water penetrates faster than cold water. However, hot water can damage seeds. Room temperature or slightly warm water works best. Most experts recommend water between 68 and 86 degrees Fahrenheit.
Soaking also leaches out germination inhibitors. Some seeds contain natural chemicals that prevent sprouting. These inhibitors wash away in water. This is particularly true for certain vegetable seeds. Therefore, pre-soaking serves multiple beneficial purposes.
Optimal Pre-Soak Durations for Different Seeds
Different seeds require different soaking times. Large, hard-coated seeds need longer periods. Small, delicate seeds require less time. Understanding these differences prevents problems. According to BBC Gardeners’ World, proper seed preparation is crucial for successful gardening.
Large legumes like beans and peas do well with 8 to 12 hours of soaking. This softens their thick coats adequately. Longer soaking provides minimal additional benefit. However, soaking beyond 24 hours can cause problems. Seeds may begin to rot or lose viability.
Medium-sized seeds like squash and cucumbers need 4 to 8 hours. Their coats are moderately thick. Shorter soaking times suffice. These seeds absorb water relatively quickly. Over-soaking can make them mushy and prone to fungal issues.
Small seeds like lettuce and carrots rarely need pre-soaking. Their thin coats absorb moisture easily from soil. Soaking can actually harm these delicate seeds. They may become too fragile to handle. Direct sowing works better for tiny seeds.
Flower seeds vary widely in their needs. Morning glories and nasturtiums have hard coats. They benefit from 12 to 24 hours of soaking. Conversely, petunias and impatiens have fine seeds. These should never be pre-soaked. Always research specific requirements for your chosen varieties.
Measuring Germination Time Reduction
Quantifying the benefits of pre-soaking requires comparison. Start by testing both soaked and unsoaked seeds. Use identical growing conditions for both groups. Track the days until the first sprouts appear. Record the percentage of seeds that germinate.
In controlled experiments, pre-soaked beans often sprout 2 to 4 days faster. This represents a significant time savings. Peas show similar improvements. Sweet pea flowers may germinate up to a week earlier. These differences add up over a growing season.
However, not all seeds show dramatic improvements. Tomatoes and peppers have moderate coats. Pre-soaking might save only 1 to 2 days. For some gardeners, this small benefit is worthwhile. Others prefer to skip the extra step. The decision depends on your priorities.
Environmental factors influence results too. Warm soil accelerates germination regardless of pre-soaking. Cold, wet soil slows everything down. Pre-soaking helps most when conditions are less than ideal. It gives seeds a head start in challenging environments.
Keep detailed records of your experiments. Note the seed variety, soaking duration, and germination time. Document the percentage of successful sprouts. Over time, you will develop intuition for your specific growing conditions. This knowledge improves your gardening efficiency.

Common Mistakes in Pre-Soaking Seeds
Over-soaking is the most frequent error. Gardeners sometimes leave seeds in water too long. This can cause several problems. Seeds may begin to ferment. Beneficial organisms on the seed coat can die. The embryo itself may drown from lack of oxygen.
Signs of over-soaking include swollen, split seed coats. The seeds may emit a sour smell. Discoloration can occur. Once these signs appear, viability decreases. Therefore, set timers to avoid forgetting soaking seeds.
Using contaminated water is another mistake. Tap water containing chlorine can inhibit germination. Some gardeners use filtered or distilled water. Others let tap water sit overnight. This allows chlorine to dissipate. Clean water supports healthy germination.
Soaking seeds that should not be soaked causes problems. Tiny seeds like carrots become gelatinous. They clump together and are impossible to plant. Research each seed type before soaking. When in doubt, skip the soaking step.
Failing to plant immediately after soaking is problematic. Soaked seeds are actively germinating. Delays can stress the emerging embryo. Plant soaked seeds within a few hours. Have your planting area prepared in advance. This ensures a smooth transition from soaking to soil.
Temperature Considerations in Pre-Soaking
Water temperature significantly affects soaking effectiveness. Cold water slows down imbibition. The seed coat remains relatively stiff. Warm water accelerates water absorption. The coat softens more quickly. However, temperature extremes cause damage.
Very cold water below 50 degrees Fahrenheit is ineffective. Seeds absorb water too slowly. You may need to extend soaking time considerably. This increases the risk of other problems. Therefore, room temperature water is preferable.
Hot water above 90 degrees Fahrenheit can kill seeds. The heat damages proteins in the embryo. Some gardeners accidentally use hot tap water. Always test water temperature before adding seeds. Lukewarm water feels comfortable to your touch.
Some advanced techniques use scarification combined with warm soaking. Scarification involves nicking the seed coat. This creates openings for faster water entry. Combined with warm water, germination accelerates dramatically. However, this technique requires practice to avoid damaging seeds.
Maintaining consistent temperature during soaking helps. Place the soaking container in a stable environment. Avoid areas with temperature fluctuations. A consistent 70 to 75 degrees Fahrenheit works well. This mimics ideal spring soil conditions.
Alternative Methods to Speed Germination
Pre-soaking is just one technique for faster germination. Several alternatives exist. Scarification physically breaks the seed coat. Gardeners use sandpaper or a file. Gently scratch the surface to create openings. This allows water to enter more easily.
Stratification mimics winter conditions. Some seeds need cold exposure before germinating. Place these seeds in moist sand in the refrigerator. Keep them cold for several weeks. Afterward, they germinate quickly when planted. This method works for many perennials and trees.
Using germination heat mats provides consistent warmth. These electric mats maintain optimal soil temperature. Warm soil speeds up metabolic processes. Seeds germinate faster regardless of ambient air temperature. This is particularly useful for heat-loving plants like peppers and eggplants.
Seed priming is a commercial technique. It involves controlled hydration followed by drying. The process activates early germination stages. However, it stops before the radicle emerges. Primed seeds germinate rapidly and uniformly when planted. Some seed companies sell pre-primed seeds.
Using hydrogen peroxide solutions can boost germination. A weak solution disinfects seed coats. It also provides extra oxygen. Some gardeners swear by this method. Mix one tablespoon of 3 percent hydrogen peroxide per cup of water. Soak seeds for 30 minutes. Research from The Royal Horticultural Society supports various seed treatment methods.
Best Practices for Pre-Soaking Success
Start with high-quality seeds. Fresh seeds germinate better than old ones. Check expiration dates on seed packets. Store unused seeds properly for future use. Cool, dry conditions preserve viability.
Use clean containers for soaking. Glass or ceramic bowls work well. Avoid metal containers that may react with water. Ensure the container is large enough. Seeds should float freely without crowding. Overcrowding restricts water circulation.
Change the water halfway through long soaks. Fresh water maintains oxygen levels. It also removes any leached inhibitors. This simple step improves results significantly. However, it is only necessary for soaks longer than 12 hours.
Label your soaking containers clearly. When soaking multiple varieties, confusion happens easily. Write the seed name and soaking start time. This prevents mixing up varieties. It also helps you track duration accurately.
Prepare your planting area before soaking begins. Have pots filled with soil. Garden beds should be ready. This allows immediate planting after soaking. The transition from water to soil should be seamless. Quick planting maintains the germination advantage.
Seed-Specific Pre-Soak Guidelines
Beans benefit from 8 to 12 hours of soaking. This includes green beans, lima beans, and kidney beans. Longer soaking provides no additional benefit. Plant immediately after soaking for best results. Therefore, time your soaking to match your planting schedule.
Peas need similar treatment to beans. Soak for 8 to 12 hours in room temperature water. Both garden peas and sweet peas respond well. The hard seed coat softens considerably. Germination often occurs 3 to 5 days faster.
Corn seeds can be soaked for 12 to 24 hours. Their large size benefits from extended soaking. However, monitor them carefully. Over-soaked corn may develop fungal problems. Plant in warm soil for best results.
Squash and pumpkin seeds need 4 to 8 hours. Their moderately thick coats soften quickly. These seeds are prone to rot if over-soaked. Additionally, warm soil temperature matters more than pre-soaking duration for cucurbits.
Flower seeds require individual research. Morning glories need 24 hours or even light scarification. Nasturtiums benefit from 12 hours. Sunflowers can be soaked for 8 hours. However, delicate flowers like petunias should never be soaked. Always consult specific guidelines for ornamental varieties.
Conclusion
Pre-soaking seeds offers clear advantages for many varieties. The technique can reduce germination time significantly. Hard-coated seeds benefit most from this treatment. Beans, peas, and certain flowers show dramatic improvements. However, the relationship between soaking duration and germination speed requires balance.
Optimal soaking times vary by seed type. Large legumes need 8 to 12 hours. Medium seeds require 4 to 8 hours. Small, delicate seeds should not be soaked at all. Understanding these differences prevents problems. Additionally, water temperature and quality matter for success.
Common mistakes include over-soaking and using improper water. Timing is crucial for maximum benefit. Plant soaked seeds immediately to maintain their advantage. Alternative methods like scarification and stratification offer additional options. Combining techniques can optimize results further.
Successful gardening requires understanding plant needs. Pre-soaking is a valuable tool in your gardening toolkit. Use it wisely based on seed type and growing conditions. With practice, you will develop intuition for when soaking helps most. Start experimenting with your favorite seeds today.
Frequently Asked Questions
Can I soak seeds overnight?
Yes, overnight soaking works well for many seeds. Eight to 12 hours is ideal for beans and peas. However, avoid soaking longer than 24 hours. Extended soaking can cause rot or reduce viability. Set a timer to ensure you do not forget your seeds.
Do all seeds need pre-soaking?
No, not all seeds benefit from pre-soaking. Small seeds like lettuce and carrots should not be soaked. They absorb water quickly from soil. Large, hard-coated seeds benefit most. Research your specific seed variety before soaking.
What happens if I over-soak my seeds?
Over-soaked seeds may rot or lose viability. The seed coat can split open prematurely. Seeds may emit a sour smell. Fungal growth can develop. If you notice these signs, discard the affected seeds. Start fresh with proper soaking duration.
Should I use warm or cold water for soaking?
Room temperature or slightly warm water works best. Water between 68 and 86 degrees Fahrenheit is ideal. Cold water slows absorption. Hot water can damage the seed embryo. Test water temperature with your hand before adding seeds.
How soon should I plant after soaking?
Plant soaked seeds within a few hours. The germination process has already begun. Delays can stress the emerging embryo. Have your planting area ready before you start soaking. This ensures a smooth transition from water to soil.
Related Topics:
Garden ideas, make it more beautiful with little money