
When your car struggles to start, the lights dim, or the battery keeps dying, the alternator might be the real culprit. This small but powerful component is responsible for charging the battery and powering electrical systems while the engine runs. If it fails, even a new battery won’t keep your car running for long. Fortunately, you don’t need to be a professional mechanic to test it. With a simple multimeter, you can quickly determine whether your alternator is working as it should. This article breaks down how to check alternator health step by step, using an easy DIY method that saves time and money.
How to Test an Alternator with a Multimeter?
The most straightforward way is to measure the voltage at your car’s battery terminals with the engine off and then running. For a full breakdown, here’s how to check alternator with multimeter using simple steps. By comparing the readings, you’ll know if the alternator is delivering enough charge to the battery. This method is reliable, affordable, and requires only a basic digital or analog multimeter, which most DIY car enthusiasts already own.
What Tools Do You Need?
Before you begin, gather a few simple tools:
- A digital or analog multimeter
- Protective gloves
- Car keys (to start the engine)
- A safe outdoor space or a ventilated garage
For quality tools and guides, you can visit Best USA Tools which provides reliable equipment for DIY testing and repairs.

Step 1: Check the Battery at Rest
Why measure with the engine off?
Before testing the alternator itself, confirm that your battery has a proper base charge. A weak battery can skew your results, making it seem like the alternator is faulty when it may not be.
Set your multimeter to DC voltage (20V range is fine). Place the black probe on the negative terminal and the red probe on the positive terminal. A healthy battery should read between 12.4V and 12.7V. Anything lower than 12.2V suggests the battery is already discharged.
Step 2: Test with the Engine Running
How should voltage change when the alternator works?
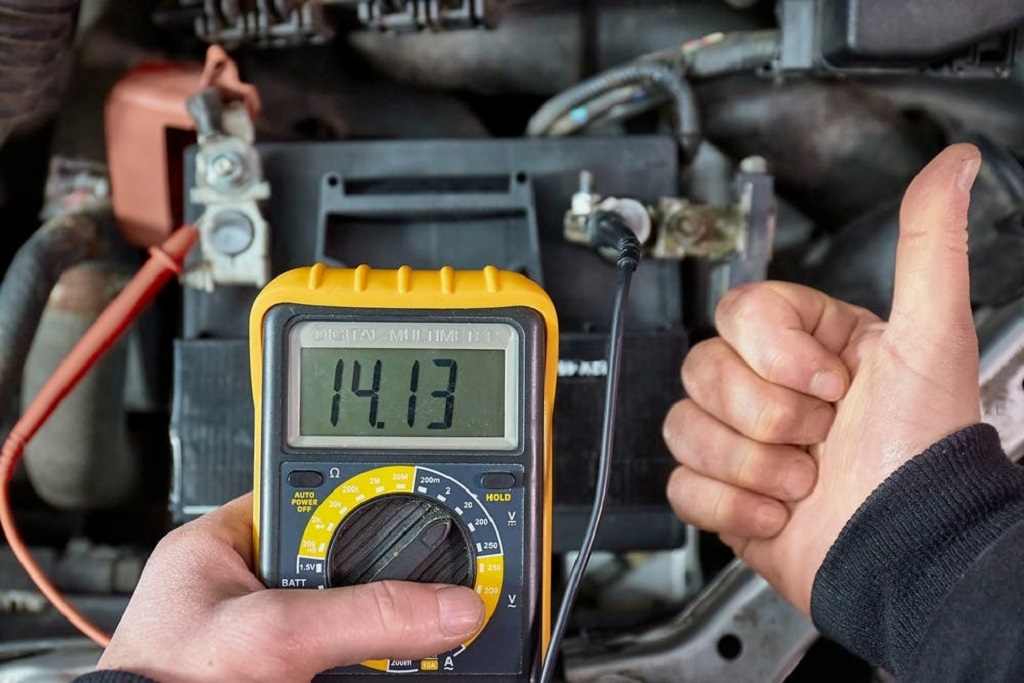
Now start the engine and let it idle. Repeat the same test on the battery terminals. A working alternator should raise the voltage to about 13.8V–14.4V. This range shows that the alternator is providing enough charge to maintain the battery and support electrical systems.
If the reading stays close to the battery-only level (around 12V), your alternator is not charging. If it spikes above 15V, the alternator may be overcharging, which can damage electronics and shorten battery life.
Step 3: Perform a Load Test
Why add extra load?
A strong alternator should handle extra electrical demand. Turn on the headlights, radio, and AC, then measure again. The voltage should stay within 13.5V–14.4V. If it drops below 13V, the alternator might be weak and struggling under load.
Step 4: Rev the Engine Slightly
Increase RPMs to about 2,000. Voltage should remain steady within the normal range. Large fluctuations often indicate failing internal components like the voltage regulator or worn-out brushes.
What if the Alternator Fails These Tests?
If your readings show undercharging or overcharging, the alternator or its internal regulator is likely at fault. At this stage, you may need a professional mechanic or a replacement unit. Ignoring the issue can lead to a dead battery and complete vehicle breakdown.
Common Symptoms of a Bad Alternator
- Dim or flickering headlights
- Battery warning light on the dashboard
- Clicking or whining noises from the engine bay
- Car stalling or difficulty starting
- Burning rubber or electrical smell
Is Testing with a Multimeter Accurate?
Yes, a multimeter provides a clear snapshot of the alternator’s charging behavior. Professional shops may use load testers for more detailed diagnostics, but for most drivers, a multimeter test is accurate enough to confirm whether the alternator is working.
For further reference, you can check authoritative resources like Family Handyman or Popular Mechanics which explain the process with diagrams.
Conclusion
Testing your alternator doesn’t require advanced skills or expensive tools. With a basic multimeter, you can check whether it’s charging the battery correctly and avoid unnecessary replacements. Regular testing can also help you catch problems early before they leave you stranded. If your multimeter readings suggest trouble, consult a mechanic for further inspection. Taking a few minutes to perform this test gives peace of mind and ensures your car’s electrical system runs smoothly.
Read More Also: Car Tools for RV and Camper Maintenance
FAQ Section
How often should I test my alternator?
It’s a good practice to test it every 6 months or whenever you notice dimming lights, slow starts, or warning lights on your dashboard.
Can I test an alternator without removing it?
Yes. The test is done directly at the battery terminals with the alternator installed and the engine running.
What if the battery is dead before testing?
You’ll need to jump-start the car first. Then test the alternator immediately after to see if it can recharge the battery.
Will a bad alternator drain a new battery?
Yes. If the alternator isn’t charging, the battery will discharge quickly, even if it’s brand new.
Can a faulty alternator damage electronics?
Yes. An overcharging alternator can burn out bulbs, fry wiring, and shorten the lifespan of onboard electronics.
How much does it cost to replace an alternator?
On average, replacement costs range from $300 to $600, depending on the car model and labor rates.
Is testing with a multimeter safe for beginners?
Absolutely. As long as you follow the steps carefully and avoid shorting the probes, it’s a safe and effective method.