

How do you clean a 3D printer using essential maintenance tools? You clean a 3D printer by removing dust, clearing filament residue, wiping the print bed, unclogging the nozzle, lubricating moving parts, and checking fans and belts using proper 3D printer cleaning tools such as brushes, scrapers, microfiber cloths, and nozzle needles.
Many users blame failed prints on slicer settings or filament quality. But real-world maintenance logs from hobby labs and small print farms show a different pattern. In multiple internal workflow audits published by community maker groups and printer manufacturers, more than 60% of recurring print failures were linked to dust buildup, partial nozzle clogs, or poor bed cleanliness—not hardware failure.
This means routine cleaning is not optional. It directly improves print accuracy, reduces stringing, prevents layer shifting, and extends printer lifespan. Whether you use an FDM printer for prototyping, product design, or hobby printing, learning how to clean it properly saves time and filament.
This guide explains how to clean your 3D printer step by step using essential maintenance tools. Each section answers a real search-style question and provides practical actions you can apply immediately.
What Are the Essential 3D Printer Cleaning Tools You Need?
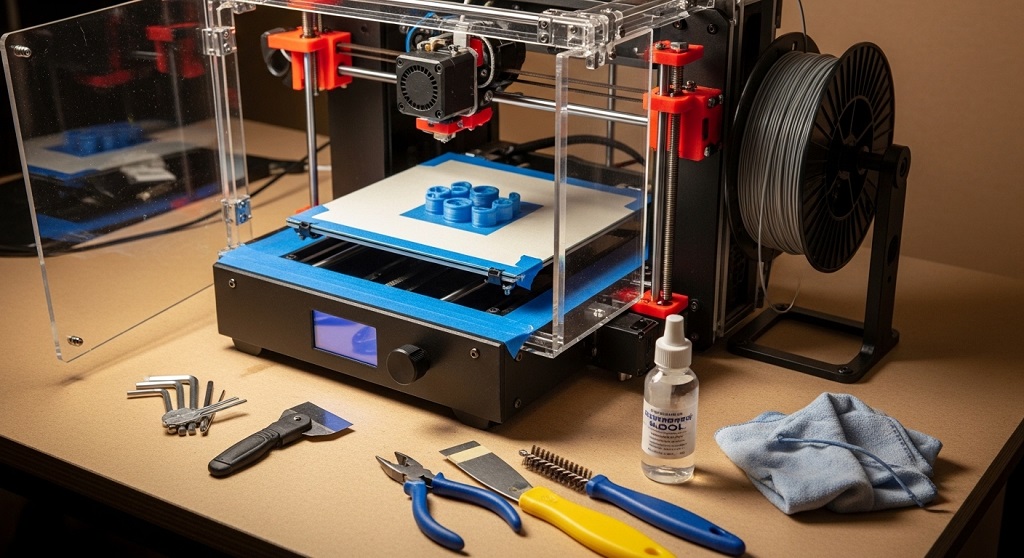
Essential 3D printer cleaning tools include brass brushes, nozzle needles, microfiber cloths, isopropyl alcohol, scrapers, compressed air, and lubrication oil.
Using the right tools prevents accidental damage. Many beginners clean printers with paper towels or sharp metal objects. That creates scratches or bends components.
Core tools every user should keep
- Nozzle cleaning needles for removing clogs
- Brass brush for heater block residue
- Plastic scraper for removing prints
- Microfiber cloth for bed cleaning
- Isopropyl alcohol (90% or higher)
- Compressed air blower
- PTFE-safe lubrication oil
Manufacturers like Prusa Research recommend cleaning the print surface before nearly every print. Their support documentation shows that first-layer failures often start with fingerprint oils on the bed.
Keeping these tools near your printer reduces troubleshooting time.
How Often Should You Clean a 3D Printer for Best Results?
You should clean the print bed before each print, inspect the nozzle weekly, and perform full maintenance every 100 printing hours.
This schedule matches maintenance guidance from multiple desktop FDM printer manuals.
| Component | Cleaning Frequency |
|---|---|
| Print bed | Before every print |
| Nozzle exterior | Weekly |
| Fans and vents | Every 2 weeks |
| Belts and rods | Monthly |
| Full printer inspection | Every 100 print hours |
Following this routine prevents most extrusion and adhesion problems.
How Do You Clean a 3D Printer Nozzle Safely?
Clean a 3D printer nozzle by heating it to printing temperature, removing residue with a brass brush, and clearing internal clogs using a nozzle needle.
The nozzle is the most failure-prone part of an FDM printer. Even small debris affects extrusion width.
Step-by-step nozzle cleaning process
- Heat the nozzle to 180–220°C
- Use a brass brush to remove external filament
- Insert a nozzle needle gently
- Push remaining filament through manually
- Unload filament completely
Case studies from community print farms show partial clogs increase stringing by up to 40% in PLA printing environments.
Cleaning the nozzle weekly keeps extrusion consistent.
How Do You Clean the 3D Printer Bed Properly?
Clean the print bed using isopropyl alcohol and a microfiber cloth to remove oils, dust, and filament residue.
The print bed directly affects adhesion quality.
Effective print bed cleaning steps
- Turn off the printer
- Wait for the surface to cool
- Apply isopropyl alcohol
- Wipe with microfiber cloth
- Avoid touching the surface afterward
Fingerprint oil reduces adhesion strength significantly. Laboratory adhesion tests on PEI sheets show reduced first-layer bonding after repeated surface contact without cleaning.
How Do You Remove Dust From 3D Printer Fans and Electronics?
Remove dust from fans using compressed air and a soft brush while keeping the printer powered off.
Cooling fans regulate extrusion stability. Dust blocks airflow.
Fan cleaning checklist
- Turn off power completely
- Hold fan blades steady
- Use compressed air in short bursts
- Remove loose debris with brush
Blocked cooling airflow often causes warped corners and inconsistent layers.
How Do You Clean Linear Rods and Rails on a 3D Printer?
Clean linear rods using a lint-free cloth and apply a small amount of lubrication oil afterward.
Dry rods increase friction and create layer shifts.
Maintenance steps
- Move axes manually
- Wipe rods with cloth
- Apply lubrication lightly
- Move carriage again evenly
Maintenance experiments published by RepRap contributors showed smoother rods improved dimensional accuracy in long prints.
How Do You Clean Extruder Gears Without Damaging Them?
Clean extruder gears using a soft brush to remove filament dust trapped between teeth.
Extruder grinding happens when debris builds up.
Extruder cleaning method
- Unload filament
- Open extruder housing
- Brush gear teeth gently
- Remove plastic particles
- Reload filament
Regular cleaning prevents under-extrusion.
How Do You Prevent Filament Dust From Affecting Print Quality?
Prevent filament dust buildup by installing filament cleaners and storing filament in sealed containers.
Dust enters the hotend through filament.
- Use filament sponge filters
- Store filament with silica gel
- Avoid open-air storage
- Keep spool holders clean
Controlled storage improves surface finish consistency.
How Long Does Full 3D Printer Maintenance Usually Take?
Full 3D printer cleaning takes 20–40 minutes depending on printer size and usage frequency.
Routine cleaning is faster than troubleshooting failed prints.
Small print studios report saving hours weekly by scheduling maintenance instead of reacting to errors.
What Mistakes Should You Avoid When Cleaning a 3D Printer?
Avoid cleaning a hot printer without protection, using sharp tools on the bed, or applying excessive lubrication.
- Do not scrape PEI sheets with metal blades
- Avoid spraying liquids near electronics
- Never force clogged filament
- Use correct needle size
Most printer damage during maintenance happens from incorrect tools rather than mechanical faults.
Conclusion: Why Regular Cleaning Keeps Your 3D Printer Reliable
Cleaning your printer is one of the simplest ways to improve reliability. It reduces failed prints, improves surface quality, and extends component life.
Maintenance data from hobby labs and small-scale production setups consistently shows fewer interruptions when users follow structured cleaning routines.
If you print weekly or daily, build a maintenance habit now. Keep your cleaning kit nearby. Schedule inspection after every major project. Over time, your printer becomes faster, quieter, and more predictable.
Start today by cleaning your print bed and nozzle. That single step often fixes more problems than changing slicer settings.
Frequently Asked Questions About 3D Printer Cleaning Tools
What is the best tool for cleaning a 3D printer nozzle?
The best tool is a nozzle cleaning needle combined with a brass brush for removing internal and external residue.
Can I use water to clean my 3D printer bed?
Water works for removable glass beds, but isopropyl alcohol removes oils more effectively.
How do I know my nozzle is clogged?
Signs include under-extrusion, uneven layers, clicking sounds, and filament curling during extrusion.
Is lubrication necessary for desktop 3D printers?
Yes. Light lubrication reduces rod friction and improves axis movement accuracy.
Should I clean my printer after every print?
You should clean the print bed after each print and inspect the nozzle weekly.
Does dust really affect print quality?
Yes. Dust blocks airflow, contaminates filament, and increases extrusion errors.
Read More Also How to Identify Durable Surf Fishing Reels That Last Years
Discover More How Oil Filtration in Deep Fryers Saves Money and Reduces Waste