
Taking out a bathtub faucet stem can appear to be a complicated task, but with the right tools and a little bit of effort, it is entirely feasible to do it yourself. As someone who has carried out this task numerous times, I can guide you through the entire process step-by-step, so you can accomplish it effortlessly.
First, you need to gather all the necessary tools like pliers, an adjustable wrench, and a screwdriver. Then, it’s crucial to shut off the water supply and drain any remaining water from the pipes. You can then remove the faucet handle, the escutcheon plate, and the retaining nut to access the faucet stem. Finally, use pliers to grip and rotate the stem counterclockwise, and it should come out without much effort. By following these steps carefully, you can successfully remove the bathtub faucet stem and carry out any necessary repairs or replacements.
Why Would You Need to Remove the Faucet Stem?
There are a few common reasons you may need to remove the faucet stem:
- Leaking from the faucet – This is one of the most common reasons. If you notice water dripping from around the faucet spout, chances are the faucet stem needs to be replaced.
- Faucet won’t turn on/off properly – If you’re having issues with water flow even after replacing the faucet cartridge, the faucet stem could be damaged. Replacing it should restore normal function.
- Replacing the faucet – When installing a new faucet, you’ll need to remove the old faucet stem that’s connected to the water supply lines.
- Cleaning/repairing parts – Sometimes you may want access to the faucet components for thorough cleaning or other repairs. Removing the stem gives you access.
No matter the reason, exploring how to replace a two handle bathtub faucet is a necessary skill for any DIYer. The steps are straightforward; it just takes a little know-how. Removing the faucet stem is a crucial part of this process.
Gather the Right Tools
Taking the faucet stem out takes some specific tools you may not have lying around:
- Adjustable wrench – To loosen and remove the faucet nuts and valves
- Faucet stem wrench – Specialty tool made to grip faucet stems for easy removal
- Replacement stem kit – Includes new stems, O-rings, washers, etc.
- Plumber’s putty – For resealing the new stem
- Rag – For cleaning away any grime or leaks
You can find these supplies at any hardware store or order them online. I recommend having them ready before tackling this project. The last thing you want is to get halfway done and realize you’re missing something!
Shut Off the Water Supply
Before going any further, you need to shut off the water supply lines under the sink or behind the bathtub. There are usually two shut-off valves – one for hot and one for cold water. Turn them clockwise all the way to the “off” position.
This prevents water from gushing out when you remove the faucet stem. Safety first!
Remove the Faucet Handle and Cap
The faucet handle needs to come off to access the stem. There is usually a small set screw on the side or back of the handle. Use a small Allen wrench or flathead screwdriver to remove the set screw.
Be careful not to strip the screw head! Once it’s loose, you can wiggle the handle off by hand.
Underneath the handle is a domed cap that covers the faucet cartridge and stem. Unscrew this cap counterclockwise and set it aside with the handle.
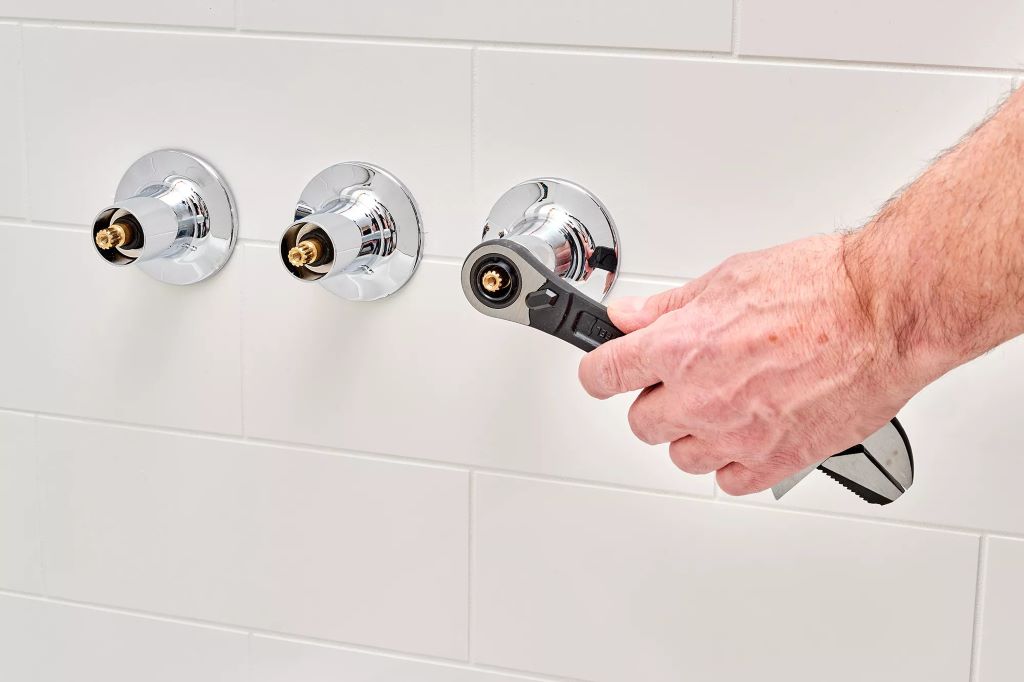
Use a Faucet Wrench to Remove the Stem
Now comes the tough part – wrestling the old stem out. It’s likely stuck on there pretty good with mineral deposits after years of use. This is where the faucet stem wrench comes in handy.
If you don’t have a specialty wrench, a set of locking pliers can also work. Just be very careful not to round off the corners of the stem nut.
Fit the wrench over the stem nut and turn counterclockwise to loosen. Apply firm yet gentle pressure – don’t force it! You may need to spray some WD-40 or another penetrant to help loosen the bond and dissolve deposits.
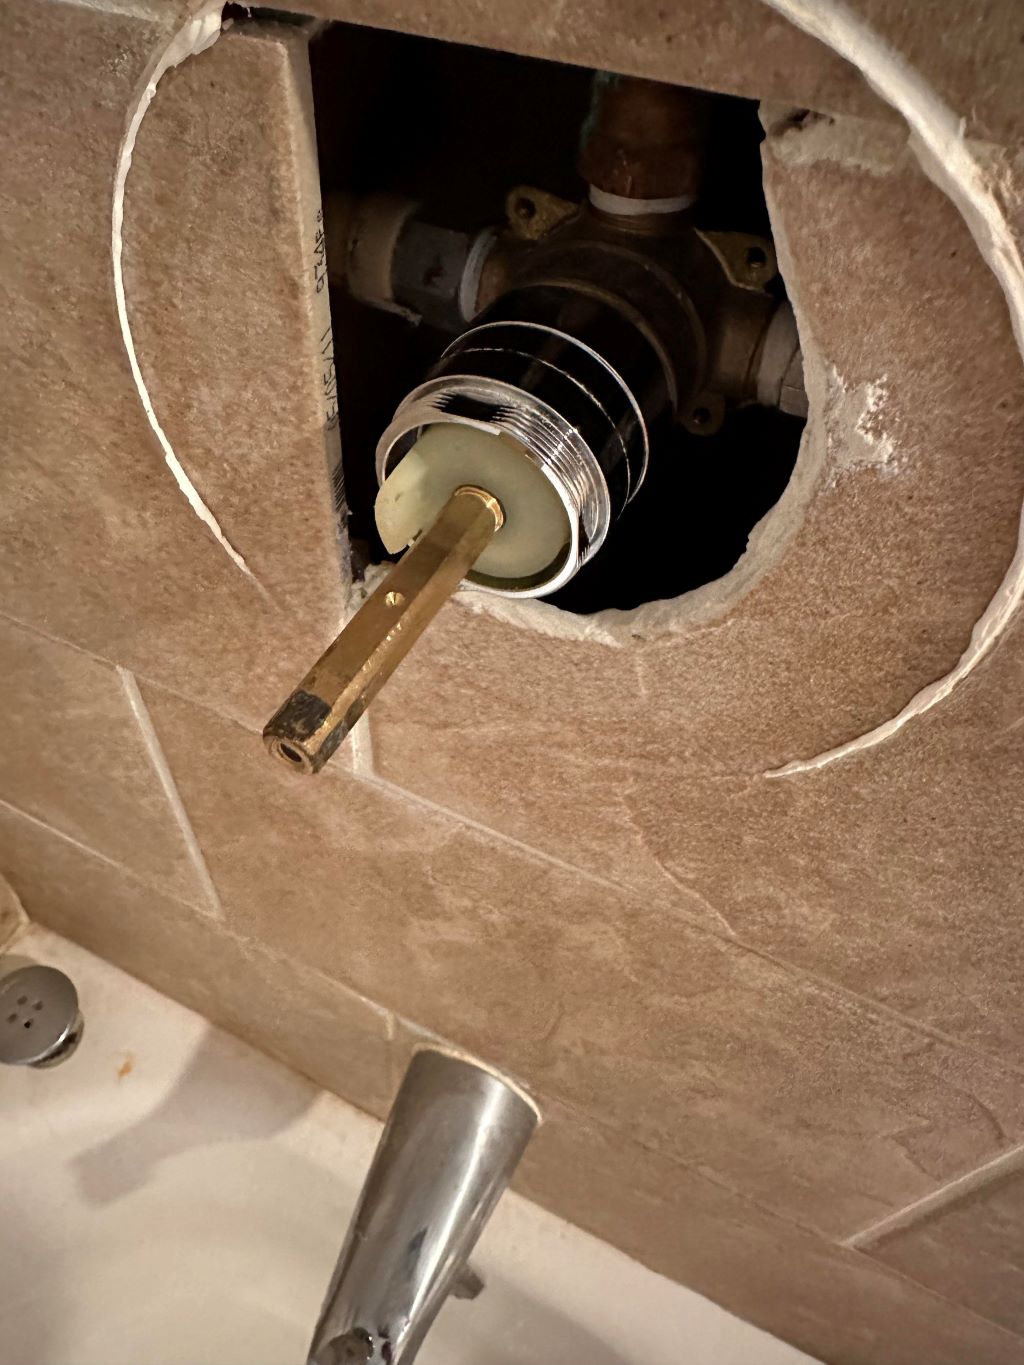
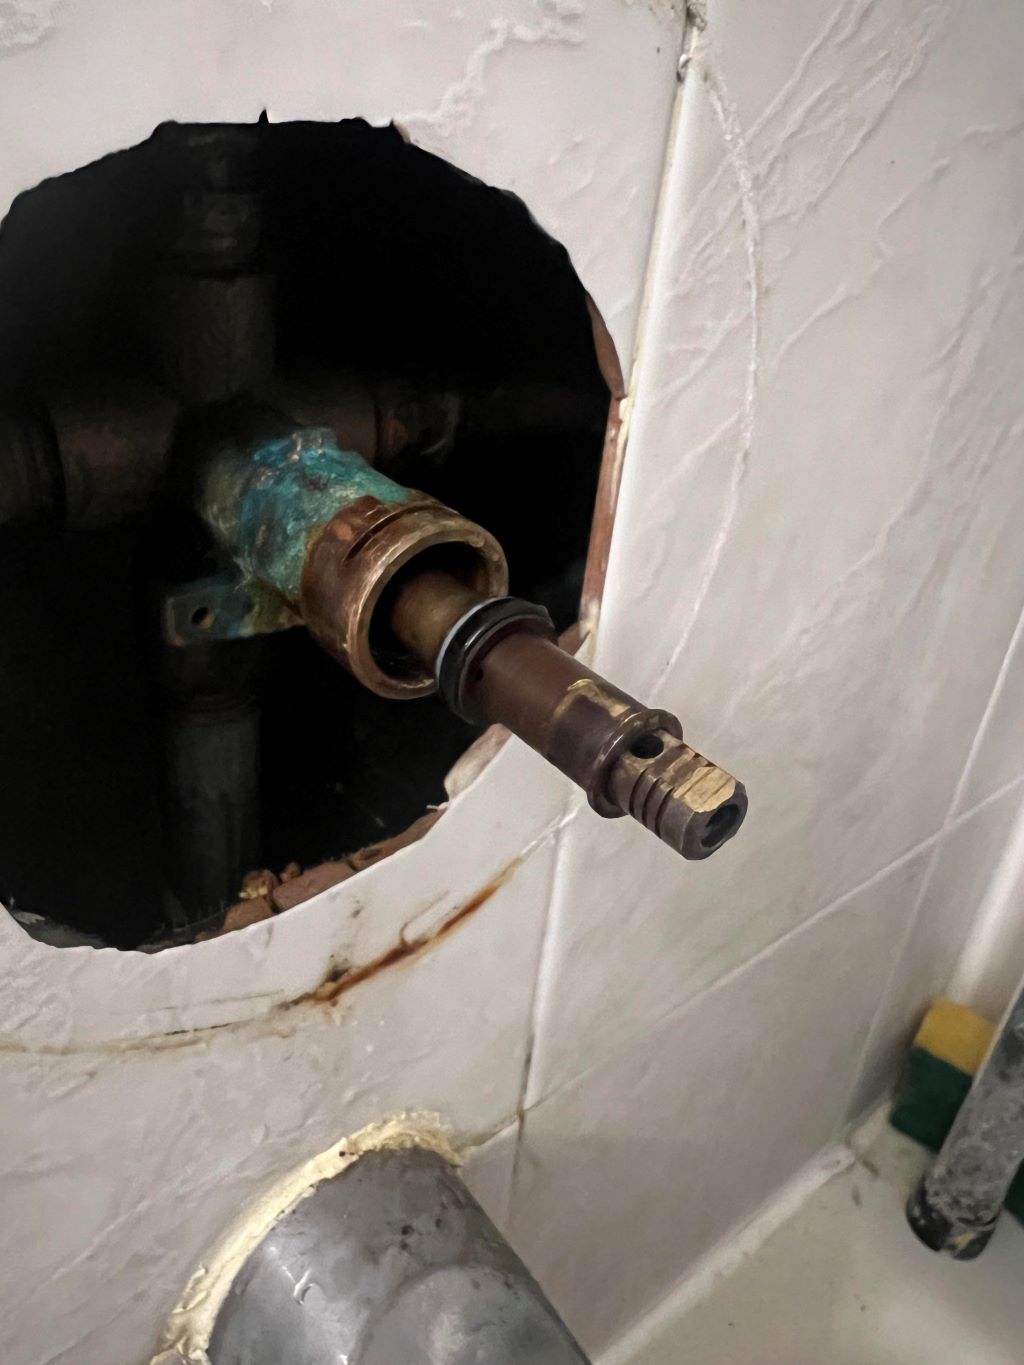
Once loose, unscrew the stem nut all the way and carefully pull the stem straight out. Take care not to bend or damage the copper tailpiece attached to the bottom.
Clean and Inspect Parts
Now is a good time to clean away any grime, mineral deposits, or old putty around the faucet body. This will help ensure a watertight seal with the new stem. An old toothbrush and some vinegar work well for scrubbing.
Inspect the stem hole and copper tailpiece for any cracks or damage. Make sure the rubber seats are in good shape with no tears or wear. Replace any defective parts before installing the new stem.
Install the New Faucet Stem
Time for the new faucet stem! Most hardware stores sell universal replacement kits with all the parts you need. Start by applying plumber’s putty around the underside of the new stem nut.
This putty will seal the connection and prevent leaks. Next, insert the new stem down into the faucet body and hand tighten the nut.
Use the faucet wrench to tighten an additional quarter turn past hand tight – you want it secure but be careful not to overtighten.
Excess force can crack the faucet body. If the stem has O-rings or washers, make sure they are seated properly before tightening.
Reinstall the Cap and Handle
You’re in the home stretch now! Take the decorative dome cap and screw it back onto the top of the faucet to hide the stem.
It’s usually just a matter of hand tightening. Push the handle back onto the stem and tighten the set screw on the side.
Turn the water supply back on and test for leaks around the new stem. If it’s drip-free, you’re all set!
Tips for an Easier Faucet Stem Removal
Replacing a faucet stem is very doable for a DIYer, but here are a few pro tips I’ve learned over the years:
- Spray WD-40 or another penetrant on the stem nut a day before you start. This allows it to soak in and break up mineral deposits. The stem will come out much easier.
- Use a basin wrench if you can’t access the space behind the faucet. The long handle and pivoting head can grip the nut even in tight spots.
- Take pictures during disassembly. This gives you a reference for how parts fit together during reassembly.
- Scrub the faucet recess with a toothbrush after removing the old putty. This ensures the new putty seals tightly.
- Hand tighten the new stem nut before using a wrench for the final tightening. This prevents over-tightening damage.
- Turn the water on slowly at first and check for leaks. Better to catch drips now instead of after reinstalling everything!
It may take a little time and elbow grease, but removing and replacing a bathtub faucet stem is very doable if you have the right tools and patience. And you’ll save a handy chunk of change compared to hiring a plumber.
I hope these steps give you the knowledge and confidence to tackle this project yourself. Just take it slow, use the proper tools, and don’t force anything too much. Let me know if you have any other bathtub faucet questions!
Frequently Asked Questions
What type of faucet stem do I need?
Most modern tub/shower faucets use cartridge style stems with ceramic disks inside. Make sure to buy the correct replacement cartridge for your faucet brand and model.
How do I get the old faucet stem out if it’s really stuck?
Penetrating oil and allowing time for it to work can help free a seized stem. Gently tapping the faucet wrench with a hammer while turning can sometimes help break loose a stuck stem as well. Avoid excessive force.
Can I damage my bathtub if I remove the faucet?
You shouldn’t damage the tub if you remove the faucet stem properly. Be very careful not to crack the tub surface when using wrenches and tools around the faucet area.
What should I do if the copper tailpipe is damaged?
If the copper tailpiece that the stem fits into is cracked or split, it’s best to call in a plumber to repair or replace it. Attempting to install a new stem with a damaged tailpipe will likely result in leaks.
How do I stop my new faucet stem from dripping?
Make sure all gaskets and O-rings are properly seated. Use plumber’s putty around the stem base when installing. Hand tighten before using a wrench to prevent over-tightening. Also, flush the lines to remove any debris.
In Conclusion
While it may look intimidating, removing a bathtub faucet stem is totally doable with some determination and the right tools. The key steps are shutting off water supply, removing the handle and cap, extracting the old stem with a faucet wrench, cleaning and inspecting the faucet body, applying putty and installing the new stem, and reassembling the handle and cap. How do you turn an old bathtub into a shower? Go slowly, use proper force, and replace any worn parts for best results. With a little patience and elbow grease, you can save the cost of a plumber and gain the satisfaction of tackling this repair yourself, transforming your outdated bathtub into a modern and functional shower.