
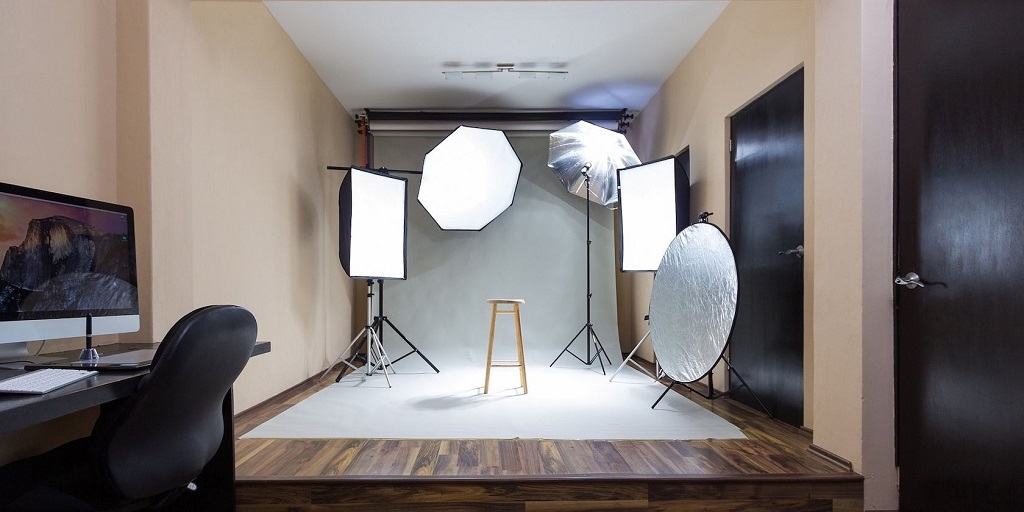
Setting up studio lighting at home is not as complicated as it may seem, even if you are new to photography or video production. Whether you’re creating content for YouTube, building a photography portfolio, or simply want to enhance your video calls, the right lighting setup can make all the difference. In this guide, we’ll walk you through the essential steps to create professional lighting for any purpose. We’ll cover everything from lighting equipment to positioning, all designed to help you achieve the perfect lighting for your needs.
Why Studio Lighting at Home Matters
When we think about professional-looking photos or videos, lighting is one of the most critical factors to consider. Lighting can make or break the quality of your shots, regardless of your camera’s capabilities. According to a study by Fstoppers, lighting is one of the top contributing factors to great photos, with more than 60% of photographers ranking it as the most important element.
A well-lit home studio can enhance the overall aesthetic, prevent shadows, and showcase your subject in the best possible way. It helps you control how the light interacts with your subject and background, thus achieving your desired results. Whether you’re shooting portraits, products, or creating content for social media, mastering lighting will give you a professional edge.
Understanding the Basics of Lighting
Before diving into the technicalities of setting up your lighting, it’s important to understand some basic principles. Studio lighting typically involves three primary types of light: key light, fill light, and backlight. Each one serves a unique purpose, working together to create balanced and visually appealing lighting.
-
Key Light: This is your main light source and will create the majority of the lighting for your subject. It should be placed slightly to the side of your camera and aimed directly at the subject to create shadows and highlights.
-
Fill Light: The fill light is used to soften the shadows created by the key light. This light should be positioned opposite the key light, at a lower intensity, to fill in those darker areas without overpowering the subject.
-
Backlight: Also known as a hair light or rim light, this light is positioned behind the subject. It helps to separate the subject from the background, adding depth and creating a visually pleasing effect.
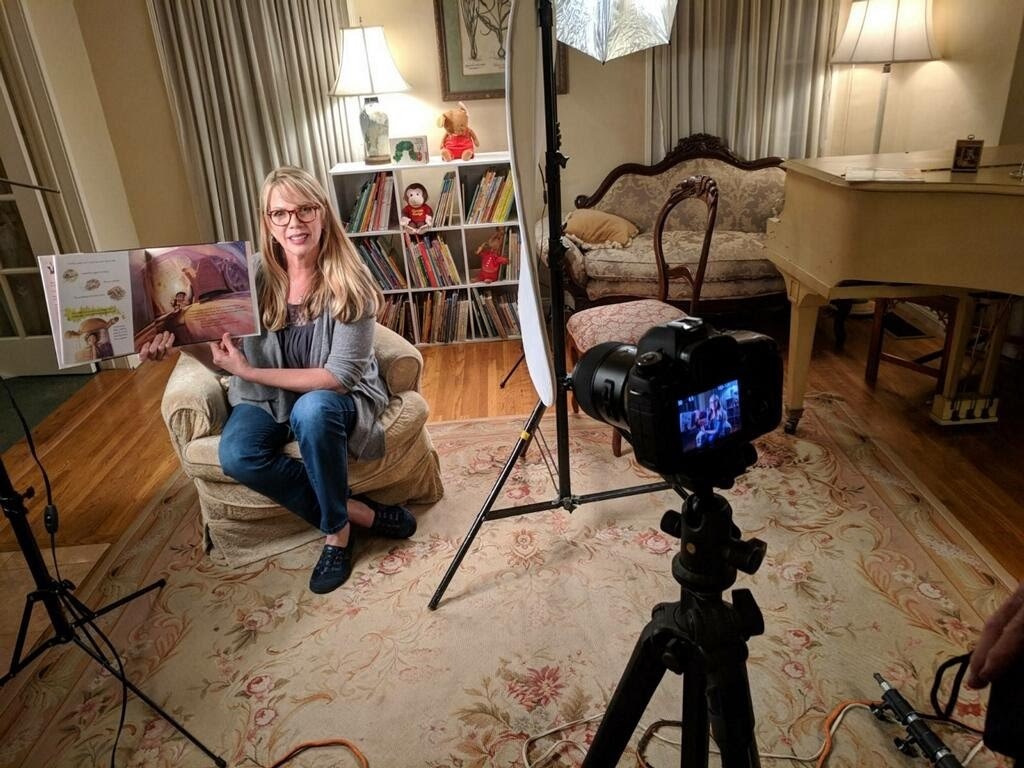
Essential Equipment for Studio Lighting at Home
To create the perfect lighting setup at home, you’ll need some essential equipment. Luckily, you don’t have to spend a fortune to get professional-quality results. Here’s a breakdown of the equipment you’ll need:
1. Softbox Lights
Softbox lights are crucial for creating soft, diffused lighting that reduces harsh shadows and creates an even light spread. They’re an excellent choice for portraits, videos, and even product photography. The diffusers built into the softboxes spread light evenly, making them an essential tool for any home studio.
Pros:
- Soft, flattering light for portraits.
- Helps reduce harsh shadows.
- Easy to adjust and position.
Cons:
- Bulky and requires space.
- Takes time to set up and adjust properly.
2. Ring Lights
Ring lights are perfect for achieving an evenly lit, soft glow. Popular with YouTubers, influencers, and content creators, these lights are a game-changer for video streaming, selfies, and makeup tutorials. Ring lights are available in various sizes, and many come with adjustable brightness and color temperature.
Pros:
- Even, flattering light.
- Ideal for vlogging or streaming.
- Compact and portable.
Cons:
- Limited to close-up shots.
- Can produce a “halo” effect, which may not be desired in all cases.
3. LED Panels
LED panels are versatile, energy-efficient, and easy to use. They offer adjustable color temperatures and are great for a range of shooting styles, including video, photography, and even live streaming. With LED panels, you can control the intensity of the light and make quick adjustments to suit your needs.
Pros:
- Adjustable color temperature and brightness.
- Energy-efficient.
- Lightweight and portable.
Cons:
- Can be expensive for high-quality models.
- May not offer the same soft light as a softbox.
4. Backdrops
A backdrop is just as essential as your lighting setup. While it doesn’t affect the lighting itself, a clean, simple background can make your lighting more effective by preventing unwanted distractions. Consider using a fabric backdrop or a collapsible backdrop that suits your style.
Pros:
- Enhances the overall shot.
- Helps control the environment.
Cons:
- Requires extra space.
- Needs regular maintenance to keep clean.
5. Light Stands and Mounts
Having sturdy light stands will help you position your lights effectively without the fear of them toppling over. Adjustable stands give you the flexibility to move lights around and change angles with ease. Investing in a good quality stand will make your lighting setup safer and more efficient.
Pros:
- Essential for safely positioning lights.
- Adjustable and flexible.
Cons:
- Takes up space.
- Can be heavy and cumbersome.
Coastal Living Room Decor With Natural Textures: Transform Your Space Into a Serene Oasis
Step-by-Step Guide to Setting Up Studio Lighting at Home
Now that you have the right equipment, it’s time to set up your home studio lighting. Follow these steps to achieve professional-quality results:
Step 1: Choose the Right Space
Start by selecting an area in your home with enough space to set up your lighting equipment. Consider using a room with neutral-colored walls to prevent color reflections on your subject. Ideally, choose a space that can be darkened, so you have full control over the lighting.
Step 2: Position Your Key Light
The key light should be your first priority. Set it up at a 45-degree angle to the subject and slightly above their eye level. This will create natural-looking shadows and highlights, giving your subject depth. If you’re using a softbox or LED panel, make sure the light is diffused to prevent harsh lighting.
Step 3: Add the Fill Light
The fill light is placed on the opposite side of the key light, at a lower intensity. Its job is to fill in the shadows created by the key light. The fill light should be softer than the key light to maintain the balance between shadows and highlights.
Step 4: Place the Backlight
For an added depth effect, place the backlight behind your subject. This creates a rim of light around the subject, helping them stand out against the background. Ensure the backlight is positioned high enough so it doesn’t spill into the front of the subject.
Step 5: Adjust and Fine-Tune
Once your lights are in place, it’s time to adjust them. Play with the brightness, distance from the subject, and angle until you achieve the desired effect. Check for unwanted shadows and adjust the intensity of your fill light to soften or enhance them.
Step 6: Test Your Setup
Before starting your shoot or recording, take test photos or videos to ensure your lighting is working as expected. This is the time to make any necessary adjustments.
Pros and Cons of Studio Lighting at Home
While the benefits of home studio lighting are clear, there are some considerations to keep in mind.
Pros:
- Cost-Effective: Once you invest in the equipment, there are no ongoing costs. You also have the flexibility to control your lighting environment at any time.
- Professional Results: With the right lighting, you can achieve studio-quality photos and videos without hiring a professional.
- Creativity: Having control over your lighting allows you to experiment and bring your creative vision to life.
Cons:
- Space Requirements: Proper studio lighting setups require space, which might be challenging in smaller homes or apartments.
- Initial Investment: While you can start small, high-quality lighting equipment can be pricey.
- Time-Consuming: Setting up lighting and making fine adjustments can take time, especially for beginners.
FAQs About Setting Up Studio Lighting at Home
Q1: Can I use natural light instead of studio lights?
A1: While natural light is great, it’s inconsistent and uncontrollable. Studio lighting provides more control over intensity, direction, and color temperature, ensuring professional results every time.
Q2: How can I make my lighting more flattering?
A2: Use soft, diffused light sources, such as softboxes or ring lights. Position your lights at a 45-degree angle and use a fill light to soften harsh shadows.
Q3: Do I need to use all three lights (key, fill, and backlight)?
A3: While it’s not strictly necessary, using all three lights will create a well-balanced and professional look. For simpler setups, key and fill lights can be enough.
Q4: What should I do if I don’t have a lot of space?
A4: You can still set up an effective lighting system in a small area. Consider using smaller LED panels or compact softboxes, and try to position your lights in a way that minimizes space usage.
Conclusion
Setting up studio lighting at home is a highly rewarding endeavor that can elevate your photos, videos, or live streams. With the right equipment, setup, and adjustments, you can achieve professional-quality results, even on a budget. Take the time to experiment with different setups and remember that lighting is key to creating the best possible outcome. Whether you’re creating content for a personal project or launching a professional brand, mastering studio lighting at home will give you the edge you need.
Read More: 10 Surprising Ways to Transform Your Ride by Incorporating LED Lights Into Skateboard Designs